Example Workflows
There are different approaches to making scripts that use eleFront, we'll refer to these approaches as workflows. Each workflow is more suited to certain tasks than others. Below are some example workflows which illustrate how eleFront scripts may be approached in different ways to deal with different demands.
Example 1:
Task:
Select objects that are scattered across several files, and create several new files containing the selected objects.
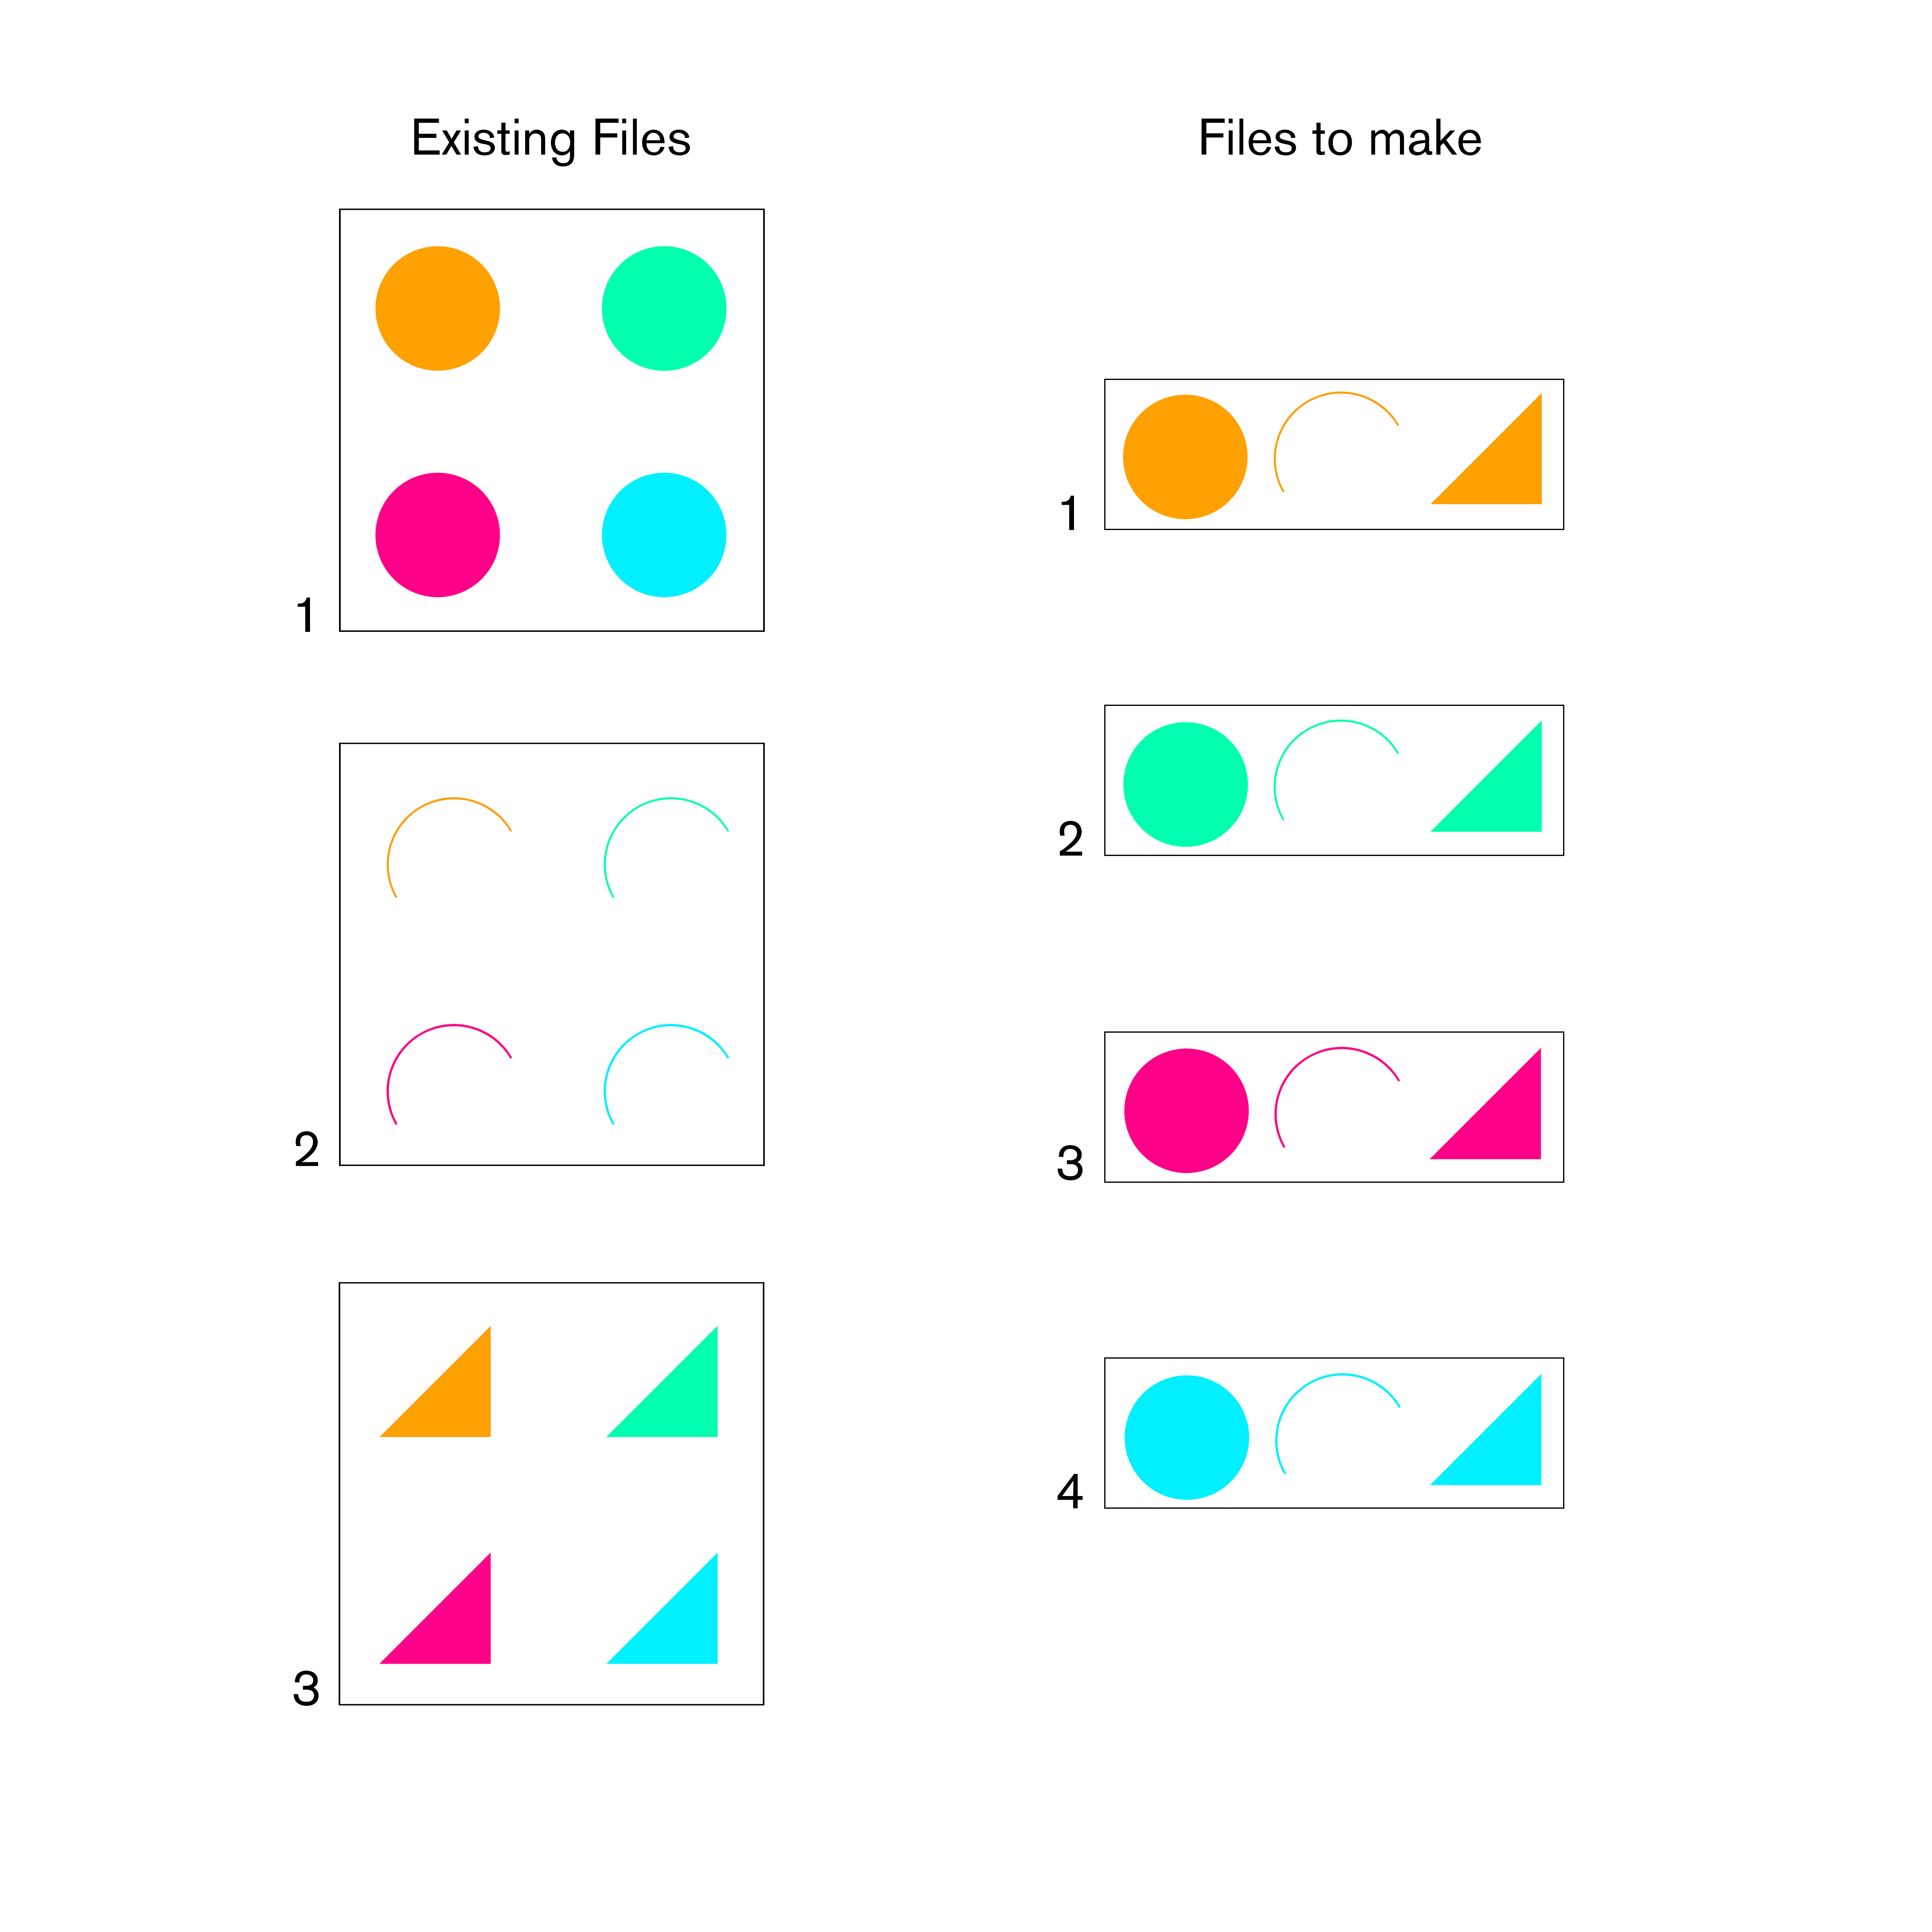 Diagram for workflow example 1
Method:
- Reference the required files directly using
Reference by Bakename. - Use
Sort by Keyto organise the objects into the new, required collections. - Bring the geometry into the Rhino File with
Manifest Ghost Geometry. - Use
eleFront Attributesto get data to make meaningful filenames with. - Use
Bake to Fileto create the files and bake the new collections to them. - QC the output files.
 Script for workflow example 1
Pros:
- Referencing from a filepath allows a faster process than referencing from a worksession.
- Baking to an external file allows a faster process than baking to the active Rhino file and exporting.
Cons:
- As the geometry is not loaded or baked to the Rhino worksession, visual feedback is limited to Grasshopper preview geometry.
- Files must be QC'd in the output file.
Example 2:
Task:
Combine several models. The level of subdivision of the current models matches that of the desired output model.
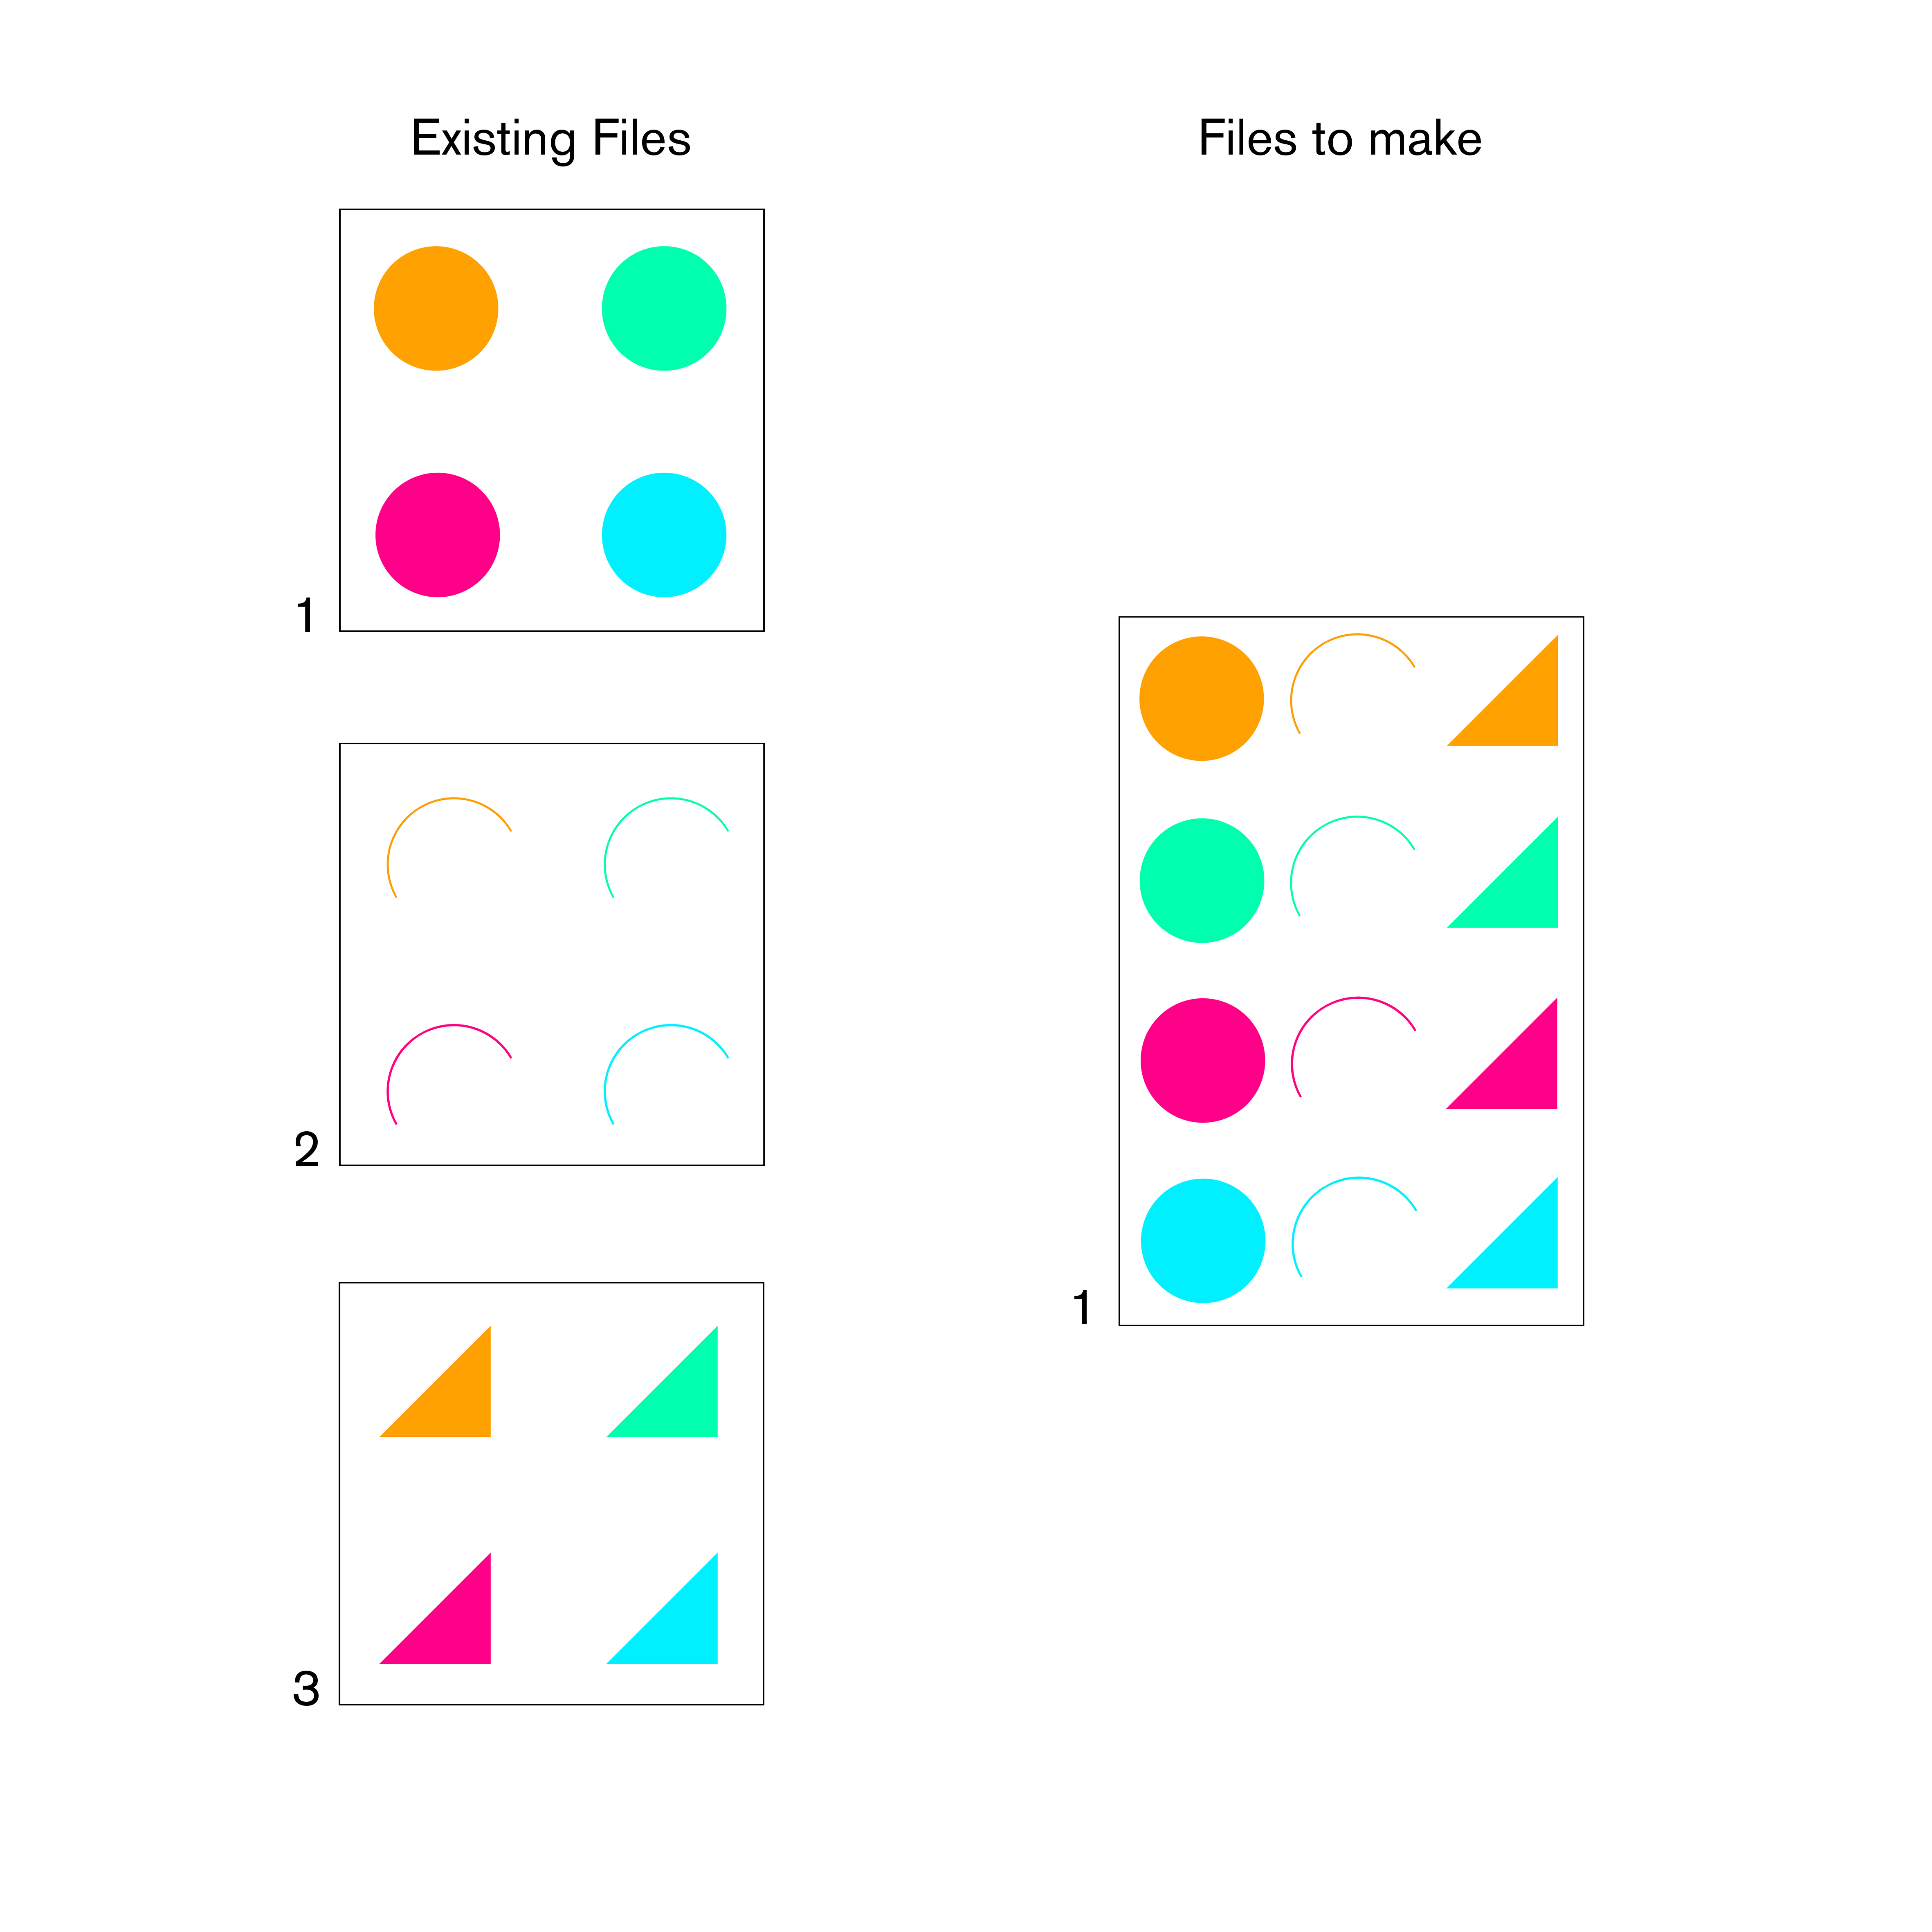 Diagram for workflow example 2
Method:
- Get the file paths using
list file. - Merge them using
merge file.
 Script for workflow example 2
Pros:
List fileandMerge fileallow us to completely skip bringing geometry into the Rhino worksession or file, allowing a much faster process. Cons:- Geometry is not bought into the active Rhino worksession at all, so no visual feedback will be available.
Example 3:
Task: Record the location of points on geometry to use for surveying.
Method:
- Load the files containing the geometry to a worksession.
- Reference it in Grasshopper.
- Extract the required points and export the coordinates to a csv file.
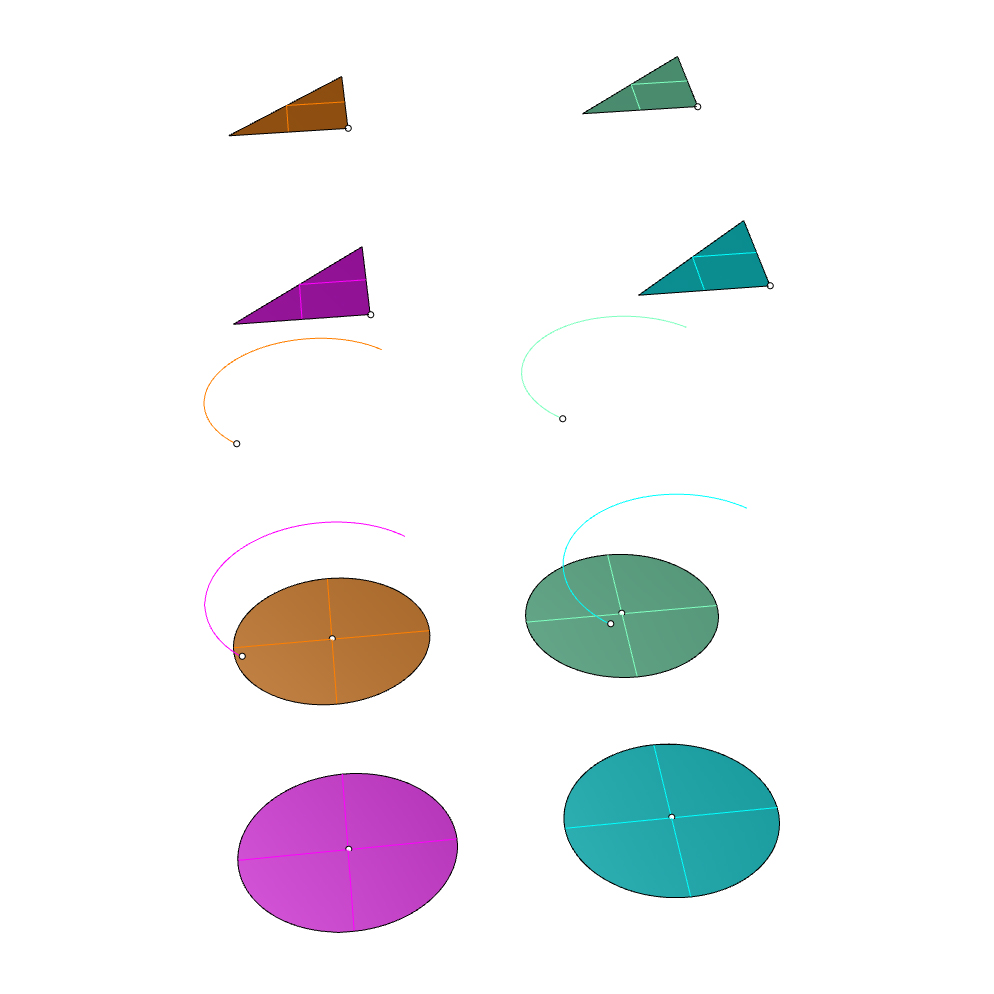 Example 3- Viewing output points against reference geometry
Pros:
- Maximum visual feedback is available in the Rhino worksession. Geometry and all of thier Rhino and eleFront properties can be inspected. Cons:
- Files need to be loaded manually to the worksession, which can be time consuming.
- Worksessions may become heavy, and multiple worksessions may need to be saved for different sets.
Example 4
Task: Boolean large collections of objects, for example a matrix of spheres from a matrix of cubes.
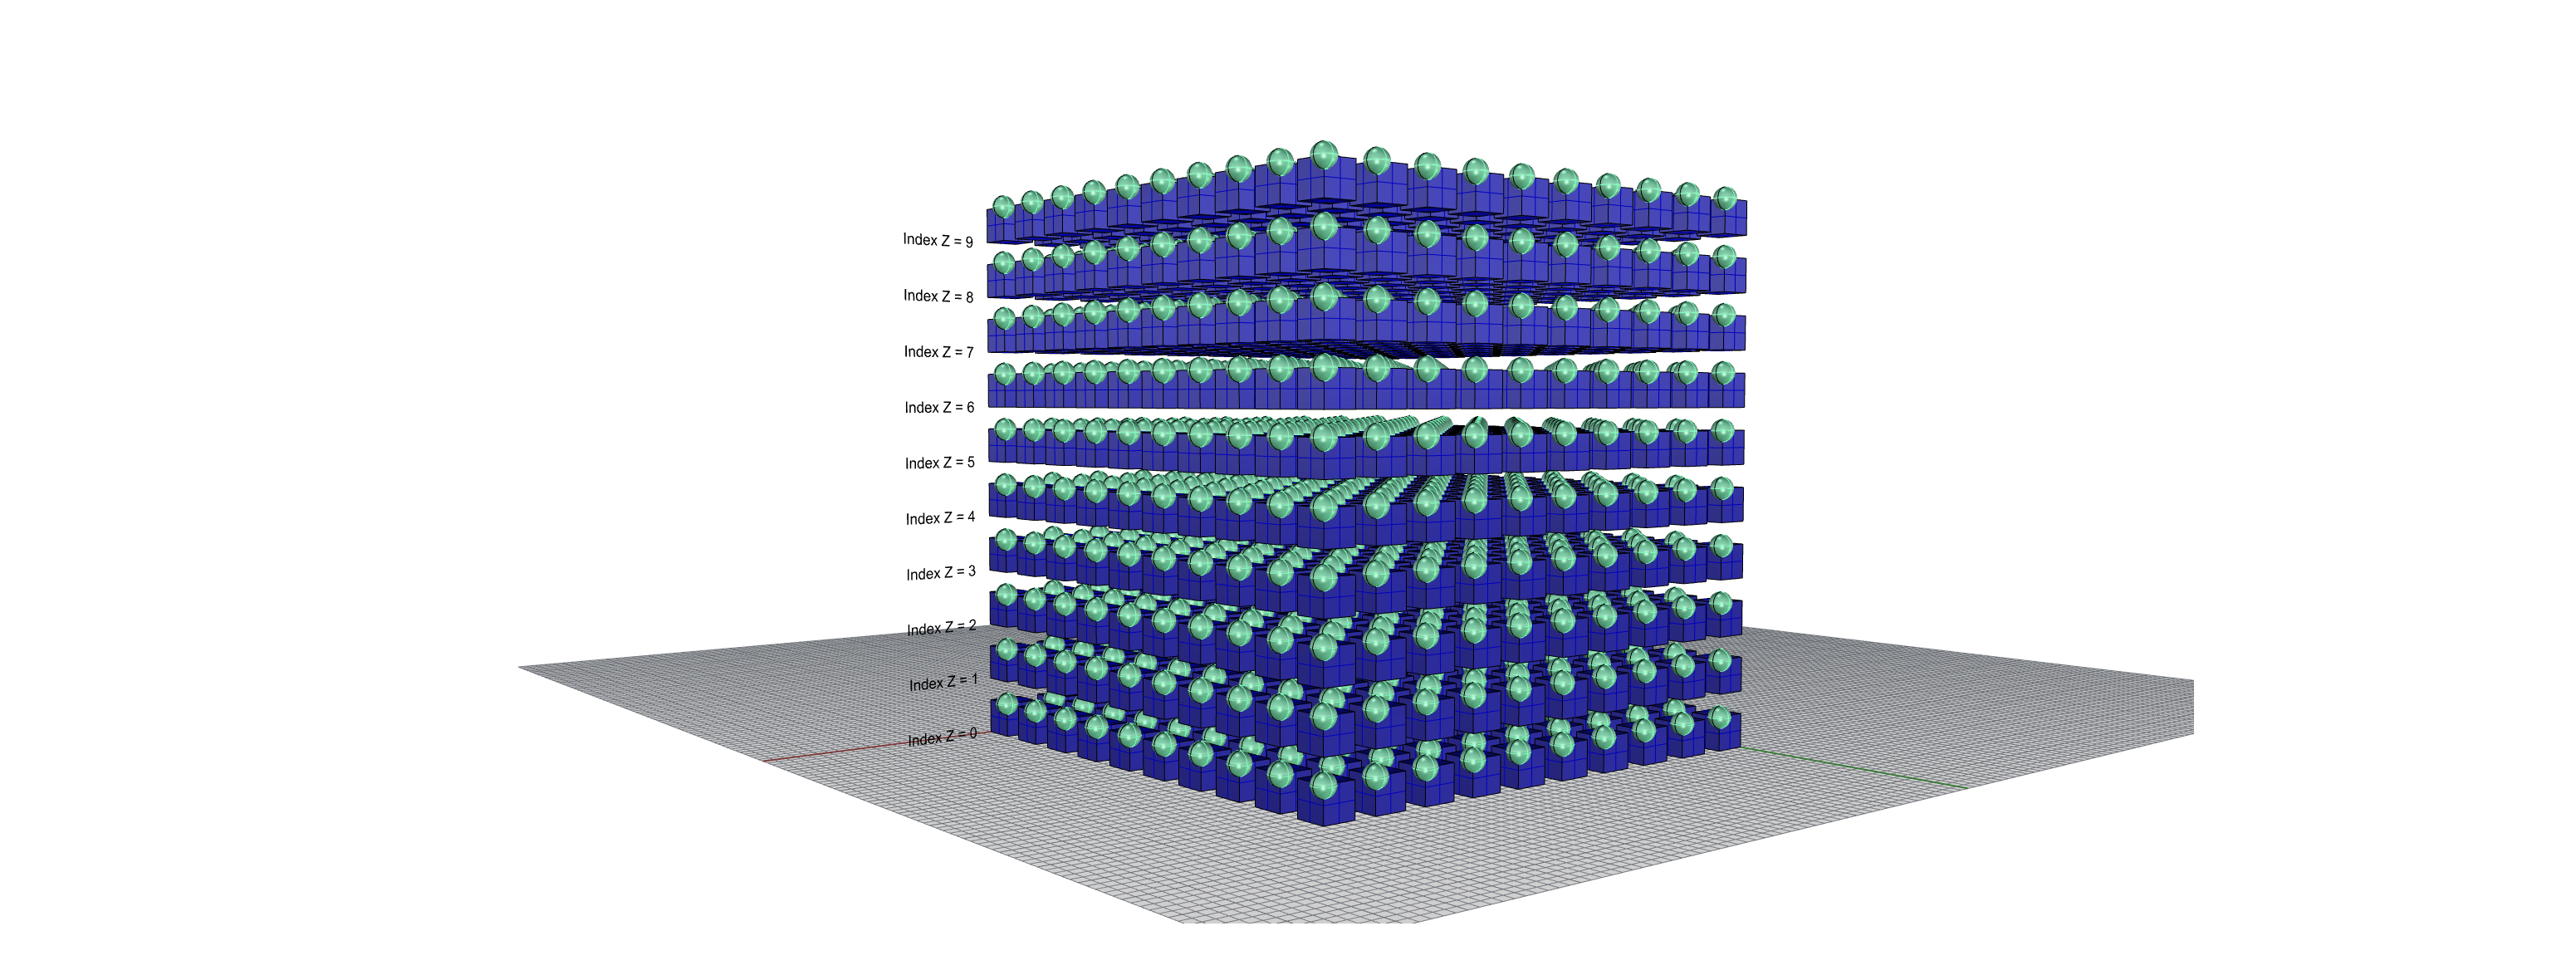 Example 4 - subtract a matrix of spheres from a matrix of cubes
Method:
 Script for workflow example 4
- Use
Text Replaceto specify the names of the files that are needed.
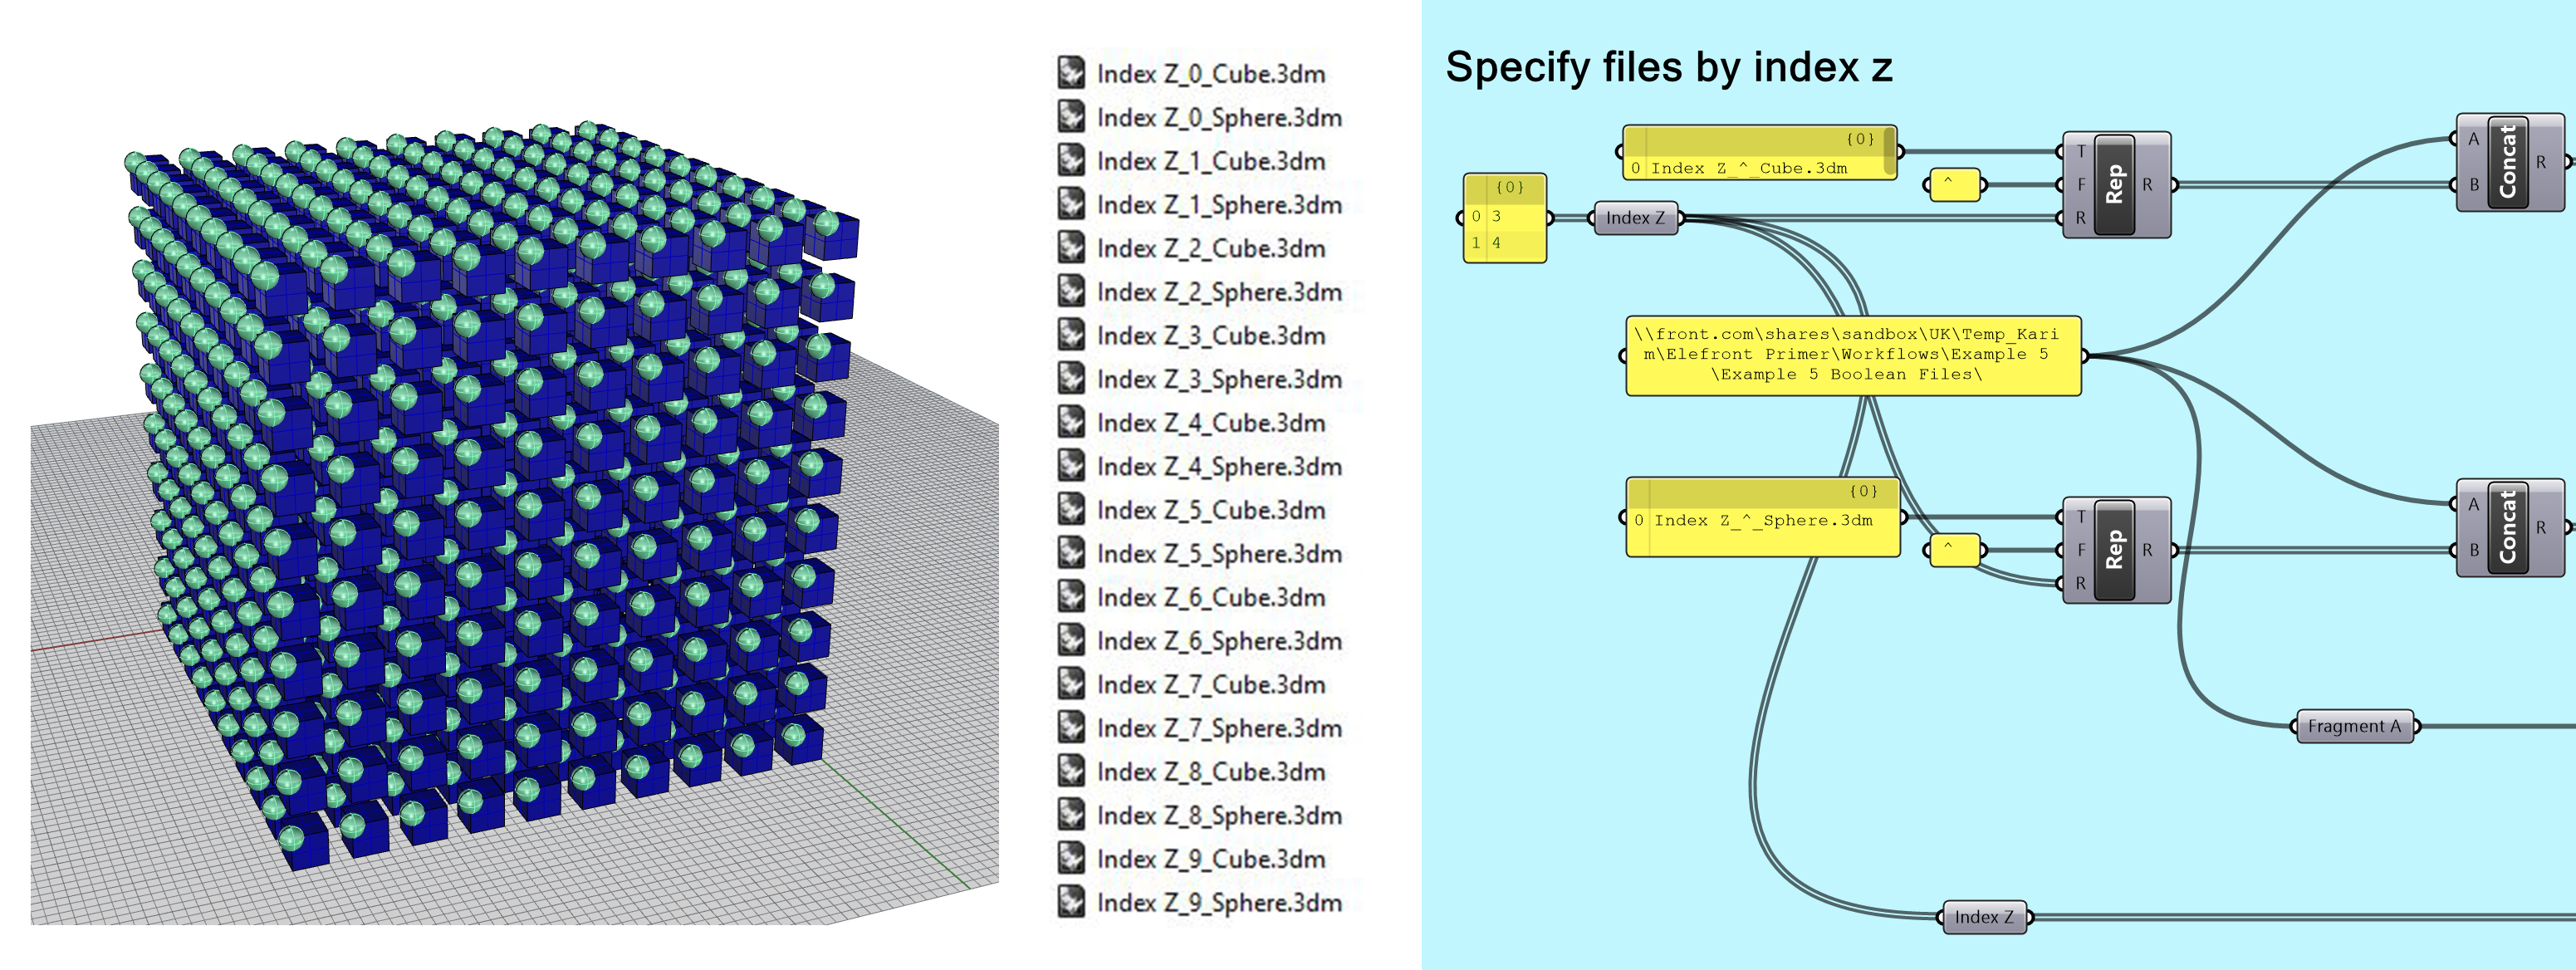
Dynamically specify filepaths
- Use
Reference by Bakenameto reference the files directly from the filepath.
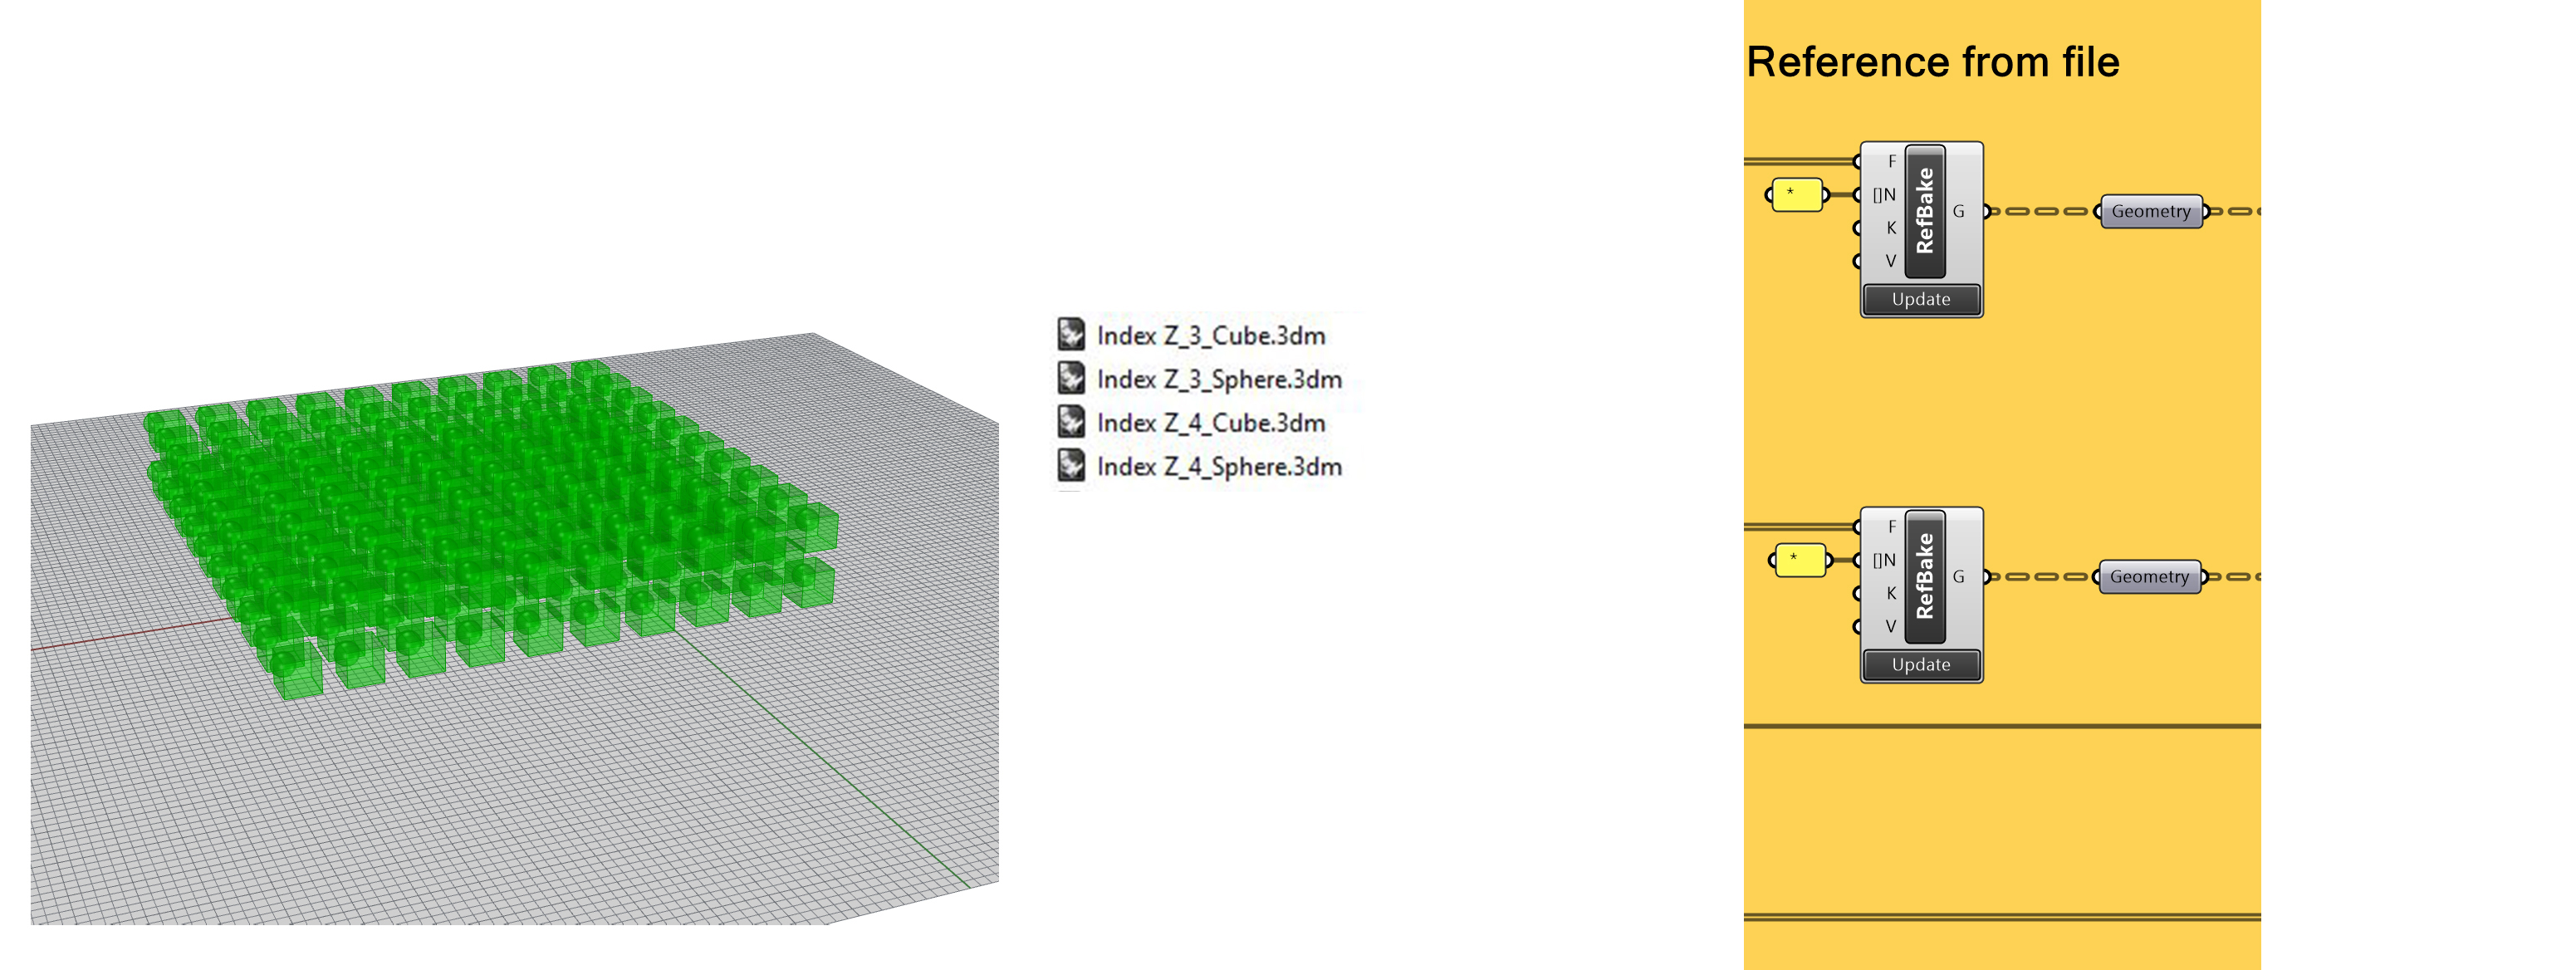
Reference by filepath
- Use
Sort by KeyandFilter by User Attributesto align the trees for the boolean operation.
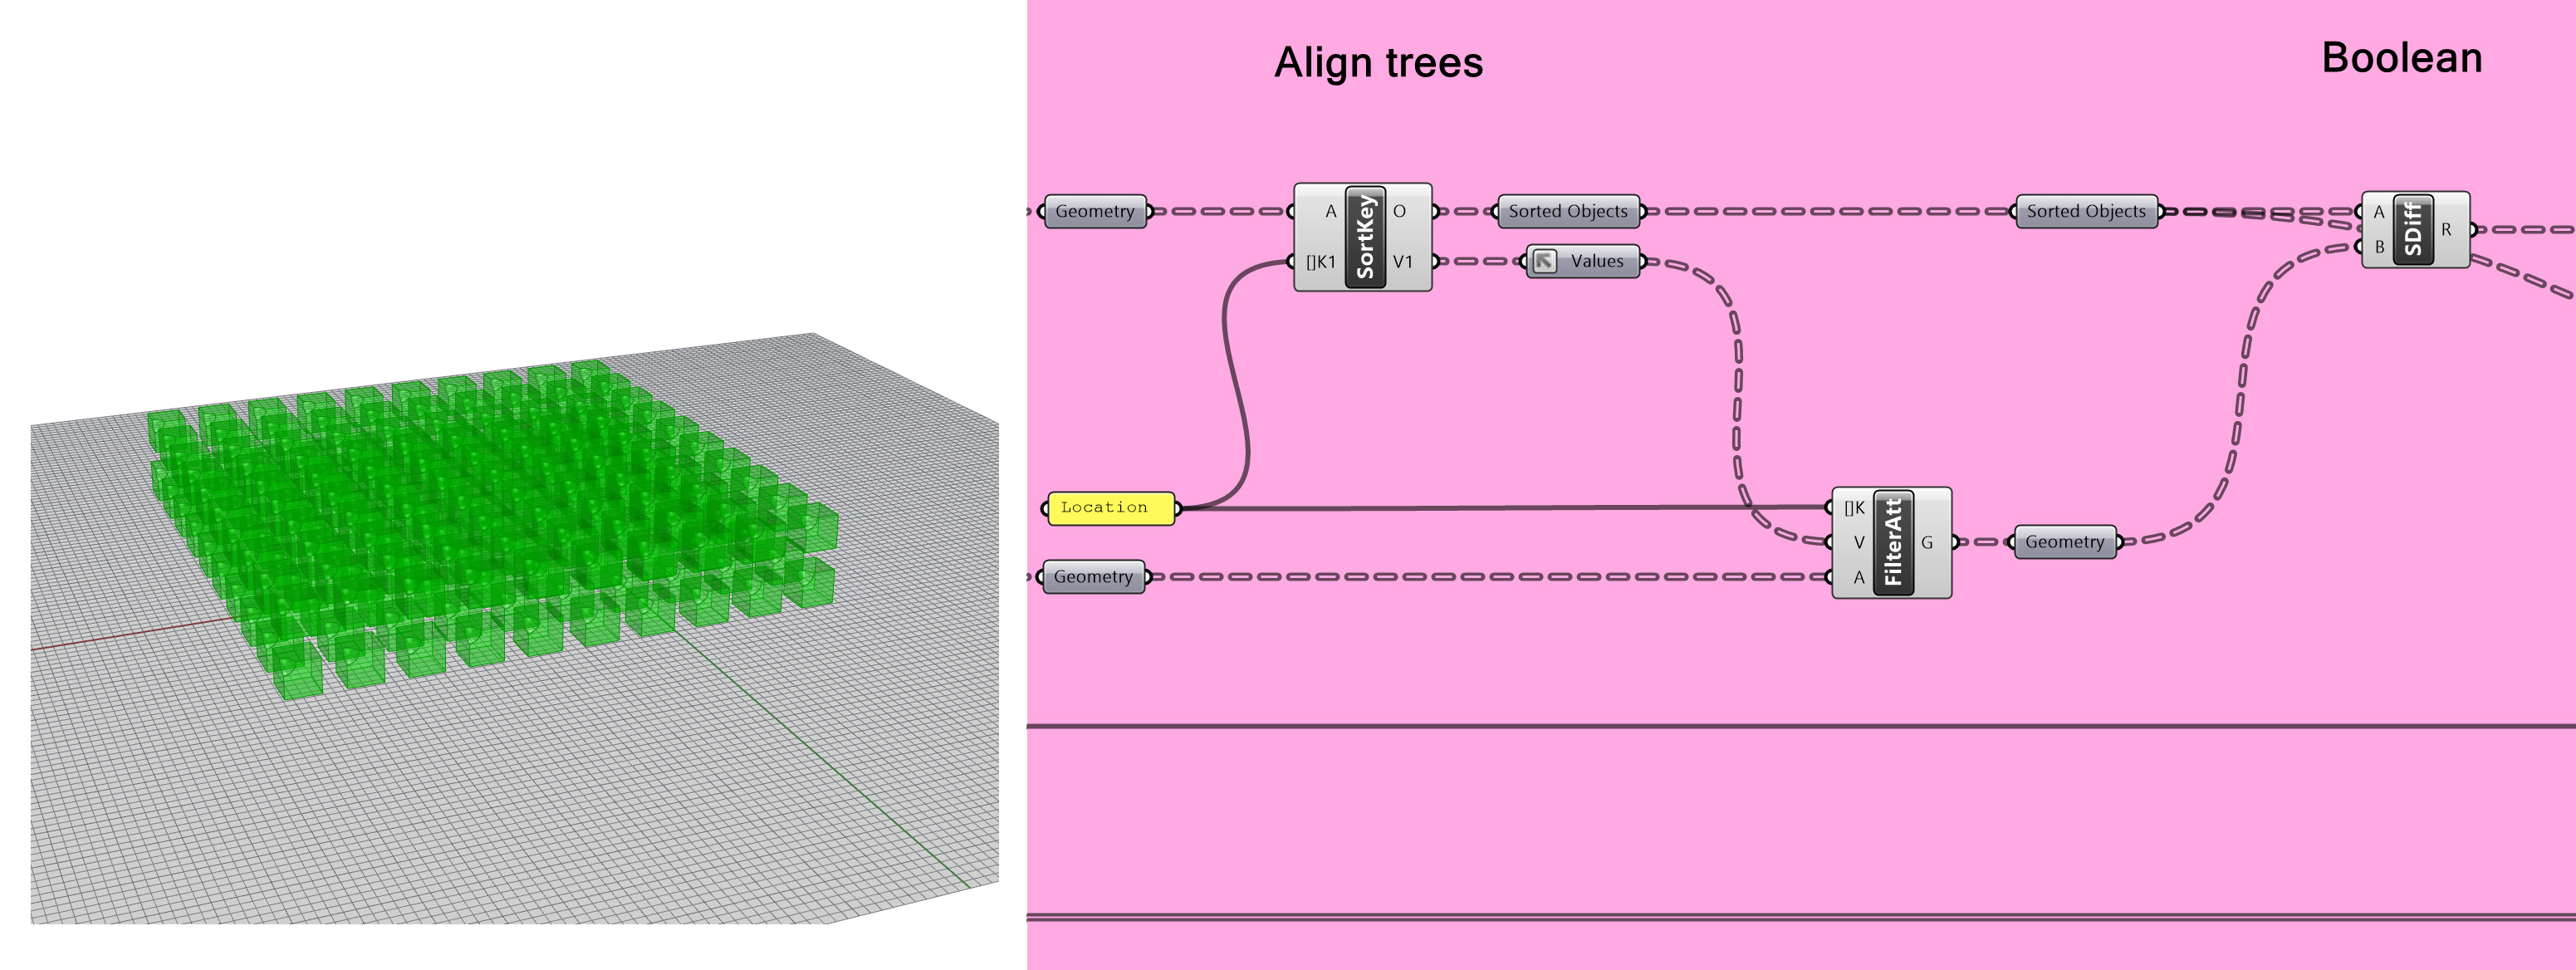
Align trees for boolean operation
- Use
Bake to Fileto send the geometry directly to a new file.
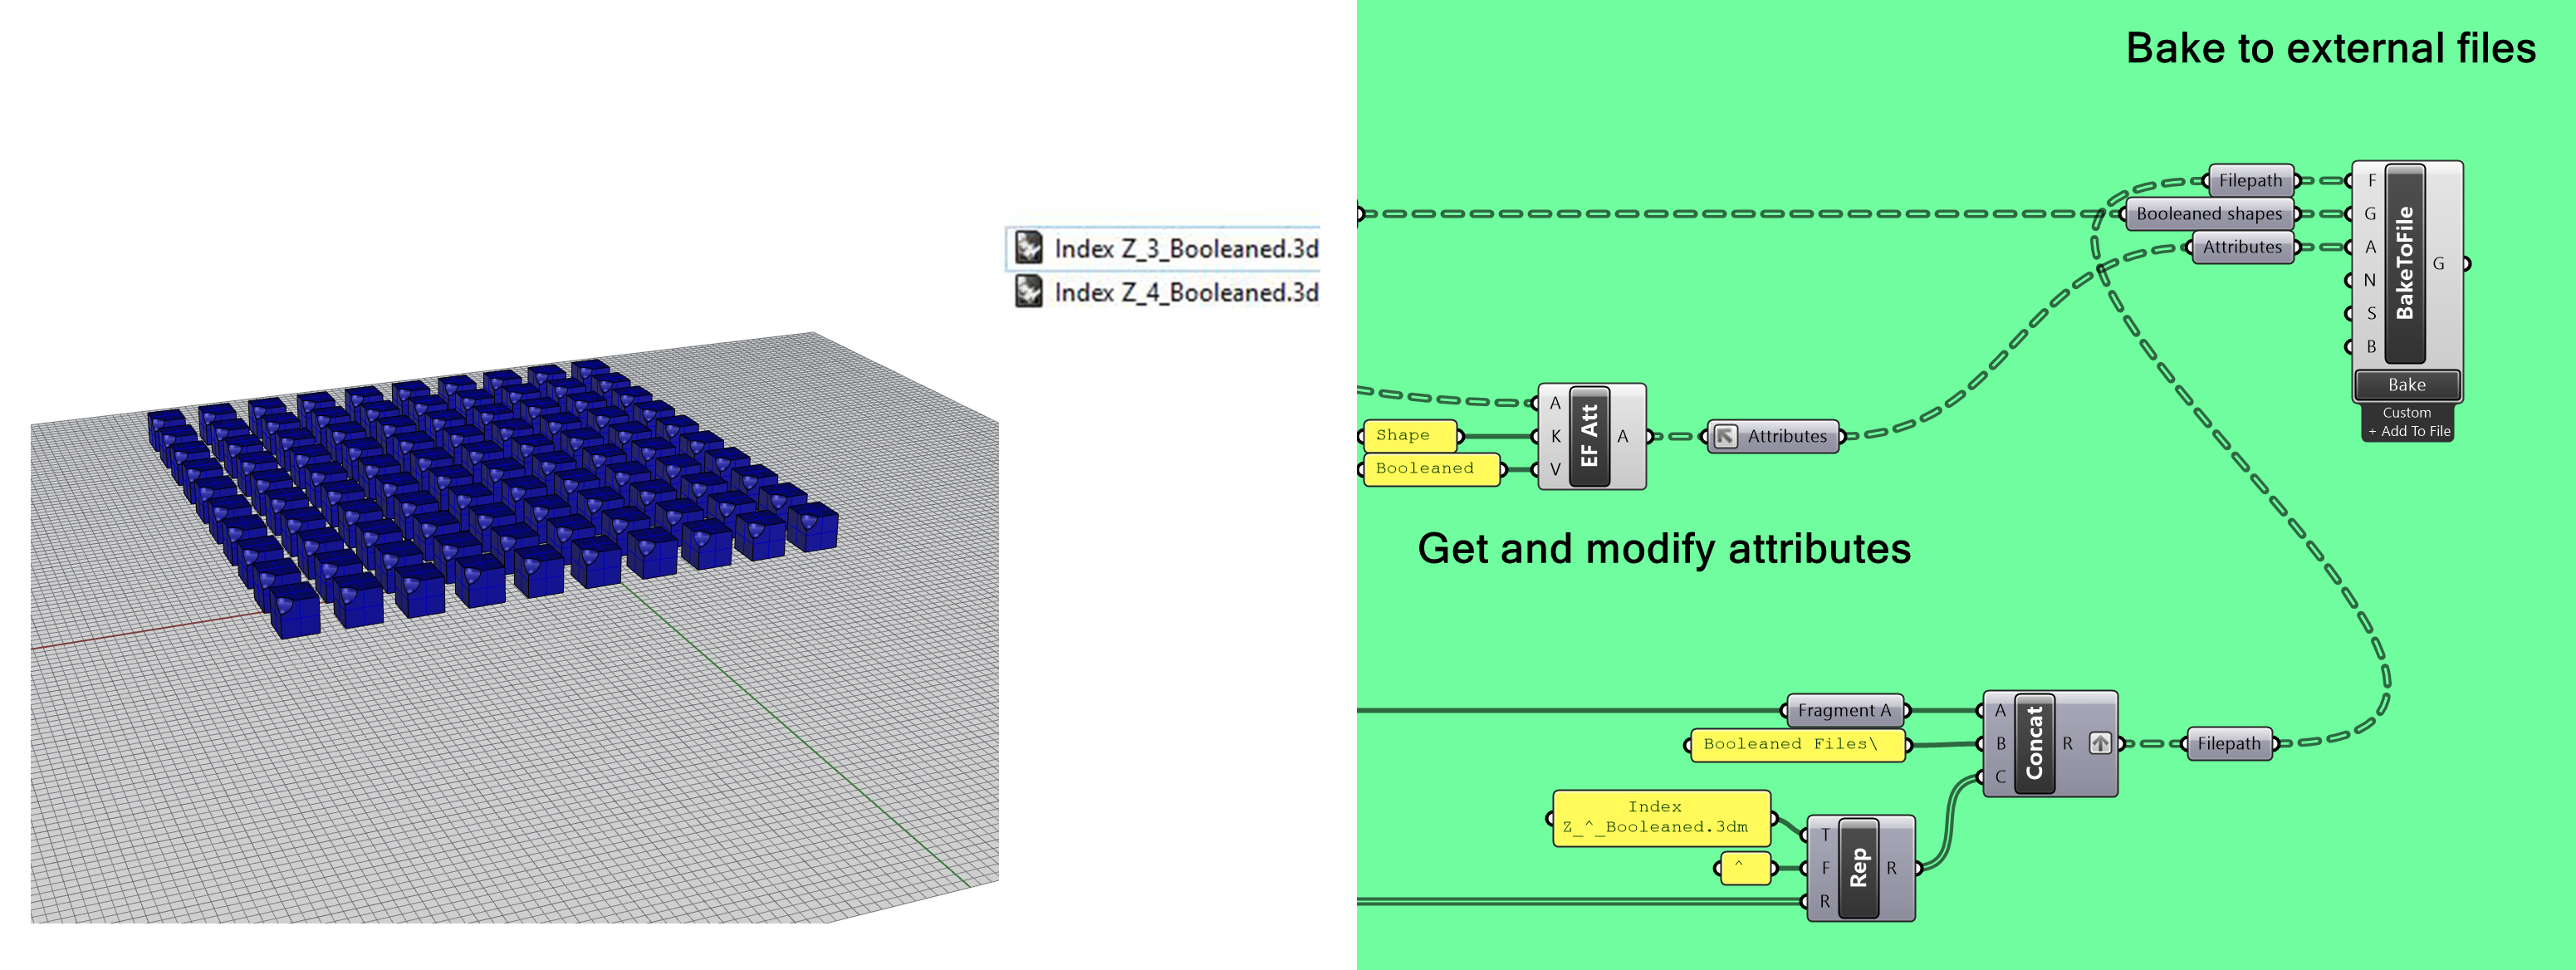
Bake to external file
- QC the booleaned shapes in the output files.
Pros:
Text ReplacewithReference by Bakenameallows us to dynamically reference specific files from larger collections, allowing a faster process than creating and referencing from worksessions.- Referenced objects can be previewed via Grasshopper.
- Bake to File allows a faster process than baking to the worksession and exporting. Cons:
- As the geometry is not loaded or baked to the Rhino worksession, visual feedback is limited to Grasshopper preview geometry.
- Files must be QC'd in the output file.
Example 5
Task: Export objects that have been baked in the active file
Method:
- Use the
Bakecomponent to return eleFront Ghost objects that represent the objects that were baked. This way it is easy to process the objects after baking, for sorting or exporting. - Sorted the Ghost Geometry by the attribute key “Row”, which in turn defines the filename for the destination file.
- This splits the baked geometry into 6 branches, with 6 different filenames, and exports the geometry respectively.
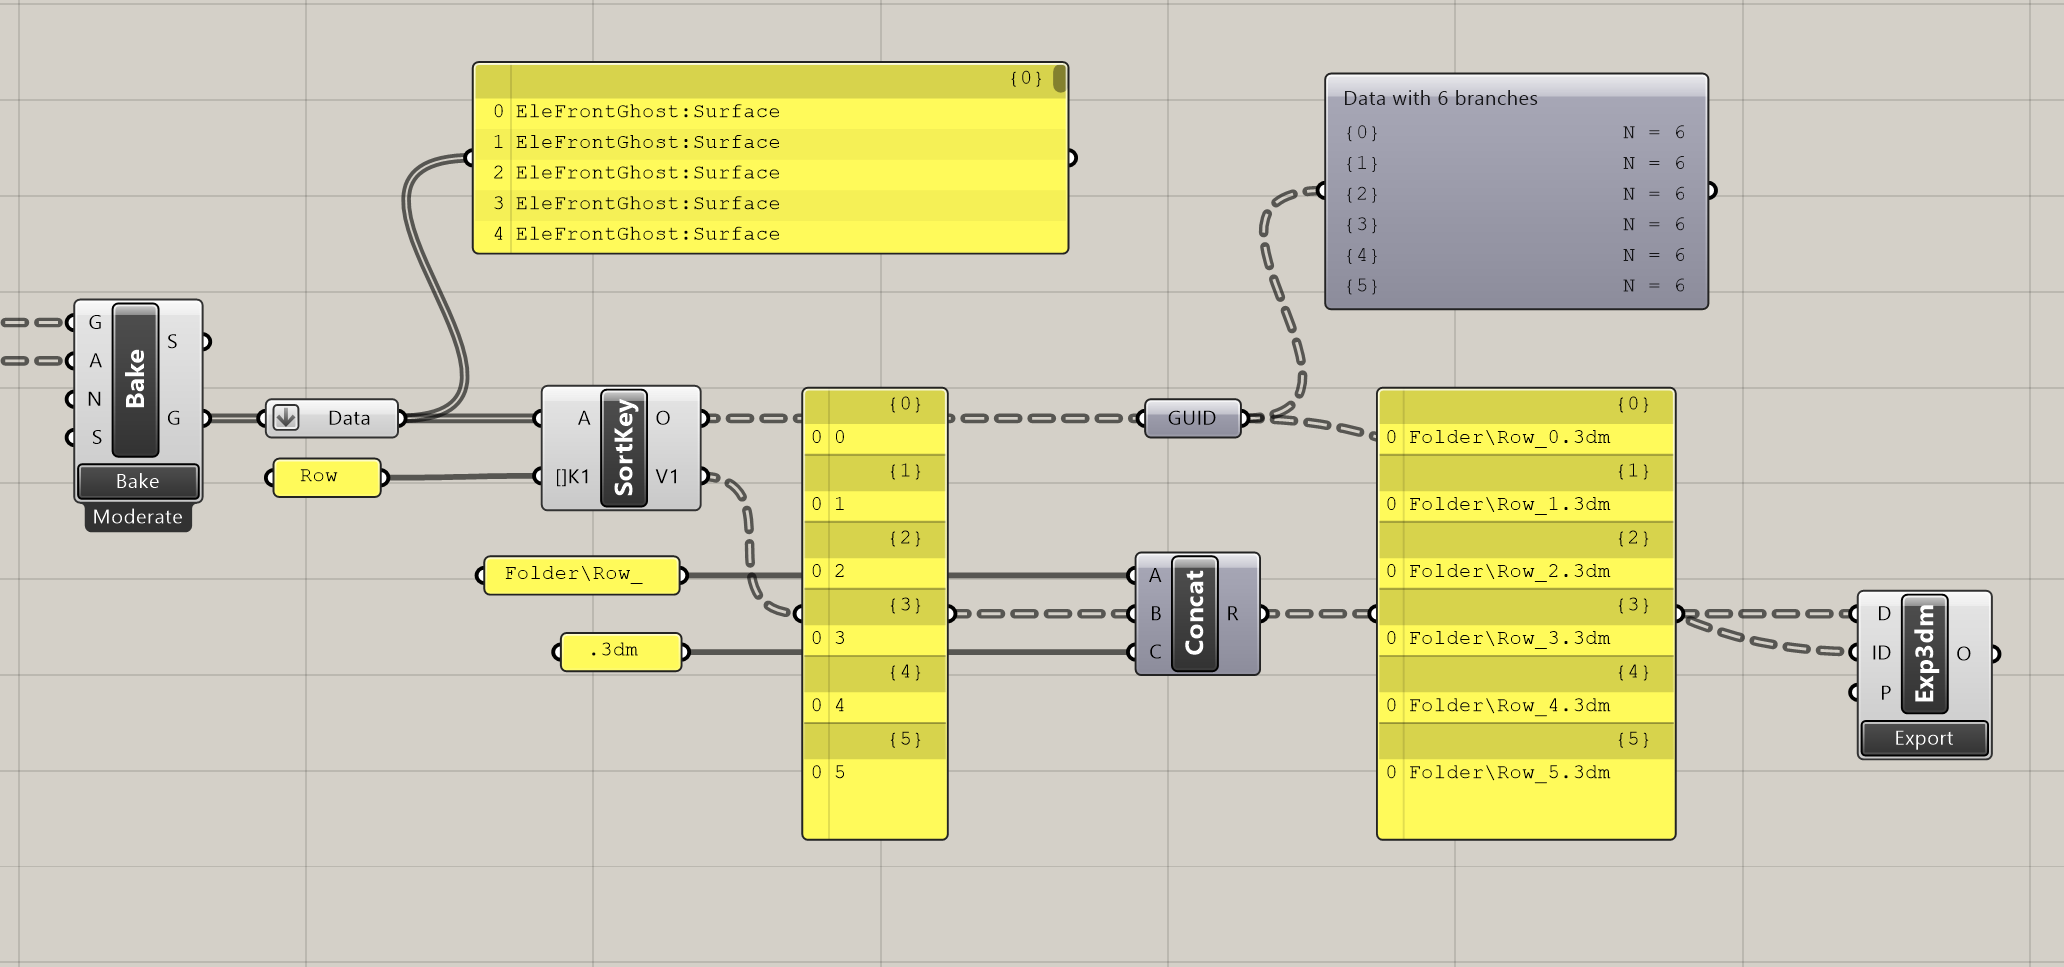 Export to folder
Pros:
- Easy to process the objects after baking, for sorting or exporting. Cons:
- Baking to the rhino file may require high memory use.
Memory Management
Many of the new features in eleFront are oriented around reducing the overall amount of memory being used in a given Rhino session.
If there is not enough free memory, all computations slow down as the computer tries to manage moving data around for each part of the solution. This can cause solve times to increase, regardless of the actual complexity of the computation. Even using multithreading cannot compensate for a scenario where there is not enough spare memory to support the computation.
Example
Consider the graphs below.
Baseline
The "traditional" way of working with eleFront, which consists of loading some reference geometry into Rhino via a worksession, then into Grasshopper via eleFront, you can see the memory usage below:

As you can see, the geometry is loaded into memory the first time, when it is attached to the Rhino document, and then another copy is created as Grasshopper geometry.
What if we skip loading to Rhino?
If you don't actually need the geometry to be available in the Rhino document, and you only want to operate on it from within Grasshopper, you can skip loading, thus only creating one copy of the geometry:

What if I don’t need all of the Geometry?
If you simply need to move objects around, or if you only need the geometry from a subset of the overall model, you can use the Ghost Geometry features to only load in a placeholder for the objects while still maintaining the attributes.

As you can see, this brings the memory footprint from 11 GB to 2.0 GB, and that's before doing any further operations in Grasshopper. Of course, if you need to operate on all of the geometry, this may not be the right approach. However, if you only needed, for example 10% of the objects, you could use Ghost Geometry to filter down to the items you need, then Manifest that 10%, and keep your total memory overhead to a minimum.